
Table of Contents
Why Testing a Used MacBook Requires a Different Approach
Used MacBooks are among the most sought-after secondhand laptops on the market — and among the most misrepresented. Apple's ecosystem creates unique risks that do not exist on Windows machines: iCloud Activation Lock can make a MacBook permanently unusable, and the butterfly keyboard era (2016-2019) left a legacy of problematic keyboards that can cost $400+ to repair even today.
The good news is that macOS provides better built-in diagnostic tools than any other laptop platform. Battery cycle counts, hardware diagnostics, and storage health data are all accessible within minutes — if you know where to look.
What This Guide Covers
- Battery cycle count and what Apple's thresholds actually mean
- iCloud Activation Lock — the single most important check before any used Mac
- Butterfly vs. Magic Keyboard — how to identify which generation you are buying
- Apple Diagnostics — the built-in hardware test most buyers never run
- Storage health checks and what S.M.A.R.T. data tells you
Recommended Testing Gear
Bring these to any used MacBook inspection for a complete port and data transfer test.

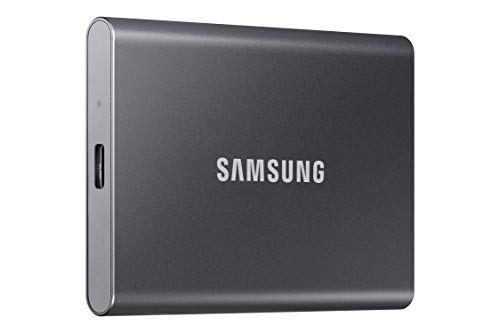

As an Amazon Associate, we earn from qualifying purchases. Prices are approximate.
Before You Meet: Identify the Generation
Ask the seller for the serial number before you agree to meet. Enter it at checkcoverage.apple.com to confirm the model, purchase date, and whether it is still under any coverage. This also reveals if the serial number is legitimate.
The MacBook Keyboard Timeline
| Years | Keyboard Type | Risk Level | Notes |
|---|---|---|---|
| 2016–2019 | Butterfly Keyboard | High | Prone to key failure from dust/debris. Test every key carefully. |
| 2020 | Scissors (1st gen return) | Low-Medium | Transition year. More reliable but still verify all keys. |
| 2021–2026 | Magic Keyboard | Low | Reliable scissors mechanism. Test but expect no issues. |
Butterfly Keyboard Repair Program
Apple's free Keyboard Service Program for 2016-2019 MacBooks ended. If you are buying a butterfly keyboard MacBook with any key issues, you are paying out of pocket for a top-case replacement — typically $400-600 at Apple. Factor this into your offer price.

1. Check Battery Cycle Count
Battery cycle count is the single most important number to check on a used MacBook. Apple specifies a maximum cycle count for each model — once exceeded, battery performance degrades significantly and replacement is recommended. MacBook battery replacements cost $129-249 at Apple, or more at third-party shops for Apple Silicon models.
How to Find Cycle Count
- Click the Apple menu () in the top-left corner.
- Hold the Option key and click System Information.
- In the sidebar, scroll down to Hardware and click Power.
- Under "Battery Information," find Cycle Count.
- Also note the Condition field — it should read "Normal."
Apple's Maximum Battery Cycle Counts
| MacBook Model | Max Cycles | What to Pay at 80%+ of Max |
|---|---|---|
| MacBook Air (2018+), MacBook Pro (2012+) | 1,000 | Deduct battery replacement cost |
| MacBook (2015-2019) | 1,000 | Deduct $129-200 |
| MacBook Pro (2011 and earlier) | 1,000 | High repair cost — factor carefully |
Cycle Count Rules of Thumb
- Under 200 cycles: Lightly used. No battery concerns.
- 200-500 cycles: Normal use. Budget 1-2 years before replacement.
- 500-800 cycles: Heavy use. Negotiate $50-100 off. Plan for replacement.
- 800+ cycles: Near or past maximum. Deduct full battery replacement cost from asking price.
2. Screen Test: Dead Pixels and Backlight
MacBook displays — especially the Liquid Retina XDR panels on M-series models — are expensive to replace. A screen replacement runs $400-700+ at Apple. Test the display thoroughly before agreeing to any price.
Use Our Free Laptop Screen Test
Run full-screen color patterns on the MacBook to check for dead pixels, backlight uniformity, and color accuracy.
Start Screen TestScreen Tests to Run
- Dead pixel test: Full-screen red, green, blue, white, and black patterns.
- Backlight uniformity: On a plain gray background, look for dark zones or bright hotspots.
- IPS glow: In a dim room, view a dark screen from an angle — some glow is normal, but excessive glow indicates a compromised panel seal.
- Color accuracy: White should appear neutral, not warm or cool-shifted.
- True Tone (2018+ models): Confirm it toggles on/off in System Settings > Displays.
Watch for Staingate on Older MacBooks
"Staingate" — anti-reflective coating delamination — affected many 2013-2016 MacBook Retina models. It appears as cloudy, blotchy patches on the screen. It is cosmetic but distracting, and cannot be cleaned off. Apple offered a free repair program that has since expired. Staingate should reduce asking price by $50-150 depending on severity.
3. Keyboard Test
Open our keyboard tester on the MacBook's browser and methodically press every single key. Do not rush this test. On butterfly keyboard models, pay special attention to keys that feel "mushy," require extra force, or produce a doubled character.
How to Test Every Key
- Open Safari and go to a keyboard test tool (or our laptop test page).
- Press every key including Function keys (F1-F12), Command, Option, Control, and Shift.
- Test Caps Lock — confirm it activates and deactivates.
- Open a text editor and type a full sentence with every character — look for double-typed letters or stuck inputs.
- On Touch Bar models (2016-2021 Pro): confirm the Touch Bar is responsive and brightness controls work.
Specific Issues by Generation
Butterfly (2016-2019): What to Watch For
Keys that feel inconsistent, stick, or require hard presses. The "e" and spacebar were historically the most failure-prone. Any irregularity on a butterfly keyboard is a serious red flag.
Magic Keyboard (2020+): What to Watch For
Liquid damage staining under keycaps (visible as discoloration). Inconsistent actuation usually indicates prior spill damage.
Touch Bar Models: What to Watch For
Unresponsive zones on the Touch Bar strip. A failed Touch Bar requires a full top-case replacement on affected models.
4. Trackpad Test
MacBook trackpads are universally excellent, which makes defects more noticeable. A swollen battery is the most common cause of a bulging or cracked trackpad — so a damaged trackpad often indicates a more serious battery problem underneath.
Trackpad Test Checklist
- Move the cursor smoothly across the full surface — no dead zones or jerky movement.
- Tap to click, one-finger click, and two-finger right-click all register correctly.
- Two-finger scroll is smooth in both directions.
- Pinch to zoom and three-finger swipe between desktops work.
- Force click (deep press) registers on a test where it is required.
- The surface sits flush with the palmrest — any bulging suggests battery swelling.
5. Port Test
Modern MacBooks have USB-C/Thunderbolt ports — some models have as few as two. All ports should handle both data and charging. Bring a USB-C hub to test HDMI output, USB-A passthrough, SD card reading, and USB-C data transfer.
How to Test USB-C Ports
- Plug your USB-C hub into each port individually — not just one.
- Connect an external drive and confirm read/write speeds are normal via Disk Utility or a file copy.
- Connect an HDMI display (or HDMI-to-USB-C adapter) and confirm external display output.
- Plug the MacBook charger into each port and confirm it charges from all ports.
- On models with MagSafe: test the MagSafe port specifically with the included charger.
Check Thunderbolt Functionality
In System Information under "Thunderbolt/USB4," each active port should appear. If a port is not listed or shows an error, that port may have damaged Thunderbolt circuitry — which is a logic board repair, not a simple port fix.
6. Storage Health Check
MacBook SSDs are soldered to the logic board on all models since 2017. There is no upgrade path. If the SSD is failing or nearly full capacity from heavy use, you are buying that limitation permanently.
Checking SSD Health in macOS
- Open Disk Utility (Applications > Utilities).
- Select the main drive in the sidebar.
- Click First Aid and run it — any errors are a red flag.
- Check S.M.A.R.T. Status at the bottom of the Disk Utility window — it should read "Verified."
- For deeper NVMe data, ask the seller to run smartmontools via Terminal:
brew install smartmontoolsthensmartctl -a /dev/disk0.
Also Check Available Space
Go to Apple menu > About This Mac > More Info > Storage. Confirm the advertised storage size matches what is available. Some sellers advertise a higher-tier model but the storage reported by macOS reveals the actual capacity.
7. iCloud Activation Lock Check
iCloud Activation Lock on a MacBook is a brick scenario. Without the previous owner's Apple ID credentials, the Mac cannot be set up for any other user. This check must happen before money changes hands — not after.
This Is Non-Negotiable
Ask the seller to sign out of iCloud in front of you before agreeing to purchase. If they cannot or will not do this, walk away. There is no legitimate reason a seller cannot sign out of their own Apple ID.
Even if the seller promises they will give you the credentials later, do not buy an iCloud-locked Mac. Account recovery after the sale is extremely difficult and Apple will not assist you.
How to Verify iCloud Status
- Go to System Settings (or System Preferences on older macOS) > Apple ID.
- Confirm the seller's Apple ID is shown and they can scroll to the bottom to sign out.
- Watch them click "Sign Out" and complete the process.
- After sign-out, verify Find My is disabled: System Settings > Privacy & Security > Location Services > System Services > Find My Mac should be off.
- Ask them to initiate an Erase All Content and Settings (System Settings > General > Transfer or Reset). This completes the handover cleanly.
8. Apple Diagnostics
Apple Diagnostics is a built-in hardware test that checks the logic board, memory, storage, and other components. Running it takes about 5 minutes and can surface hardware issues invisible to the naked eye. Most used Mac sellers have never run it — you should.
How to Run Apple Diagnostics
Apple Silicon (M1, M2, M3, M4 Macs)
- Shut down the Mac completely.
- Hold the power button until the startup options screen appears.
- Press Command + D to start Diagnostics.
Intel Macs
- Shut down the Mac completely.
- Turn it on and immediately hold the D key.
- Release when the language selection screen appears.
The test takes 3-5 minutes. A passing result shows a green checkmark or "No issues found." Any error code is a hardware problem. Note the error code and look it up — Apple's support site documents every diagnostic code and what it indicates.
Common Error Codes
- NDM: Memory issue — may indicate failing RAM
- NDD: Storage issue — SSD problem, serious concern
- NBD: Logic board issue — expensive repair
- PPF: Platform failure — major hardware problem
9. Check Warranty and AppleCare Status
A MacBook still under AppleCare+ is significantly more valuable than the same model without coverage. You inherit the AppleCare — but only if the seller has not already made claims that reduce remaining coverage.
How to Check Coverage
- Go to checkcoverage.apple.com and enter the serial number.
- This shows whether the device is under warranty or AppleCare+, and the coverage expiry date.
- Note whether any incidents have been used — AppleCare+ allows 2 accidental damage claims per year.
- Remaining AppleCare coverage adds genuine value. Price in $50-150 premium depending on months remaining.
10. Benchmark Test
Sellers sometimes overclock or misrepresent specs. Running a quick Geekbench test confirms the processor model and clock speeds match what was advertised, and reveals whether the machine is performing at expected levels.
Free Benchmark Method
- Download Geekbench 6 (free to run) from geekbench.com.
- Run the CPU benchmark — takes about 3 minutes.
- Compare the Single and Multi scores to Geekbench's published browser results for the exact model.
- Scores within 10% of the listed average are normal. More than 20% below indicates thermal issues, background processes, or hardware problems.
Also open Activity Monitor during the test and watch for thermal throttling: if CPU usage hits 100% but scores are well below expected, the thermal paste may be degraded or the fans may be clogged — common on older MacBooks.
Red Flags: When to Walk Away
Absolute Deal-Breakers
- ❌iCloud lock the seller cannot remove — permanently unusable without their credentials
- ❌Apple Diagnostics error codes — any hardware failure flagged
- ❌Swollen trackpad or battery — fire hazard, dangerous
- ❌Screen cracks or pressure damage — $400-700+ to repair
- ❌Seller refuses to run diagnostics or sign out of iCloud
- ❌Mismatched serial number on About This Mac vs. physical chassis
Negotiate Hard on These
| Issue | Suggest Deducting |
|---|---|
| Battery at 800+ cycles | $129-249 (Apple battery replacement cost) |
| Butterfly keyboard with any issues | $400-600 (top case repair) |
| Staingate on Retina screen | $50-150 |
| Charger not included | $49-79 (cost of Apple USB-C power adapter) |
| Minor cosmetic scratches | $25-50 |
Complete Used MacBook Testing Checklist
Save this to your phone or print it. Work through every section before handing over any payment.
Before the Meeting
Battery
Screen
Keyboard & Trackpad
Ports & Connectivity
Storage, iCloud & Diagnostics
Testing a Mac or Any Laptop?
Use our free screen and diagnostic tools. See also our comprehensive general laptop buying guide.